Premium Growing Equipment
Professional-grade equipment for serious growers in Mauritius.
Showing 49 to 69 of 69 products
Mars Hydro
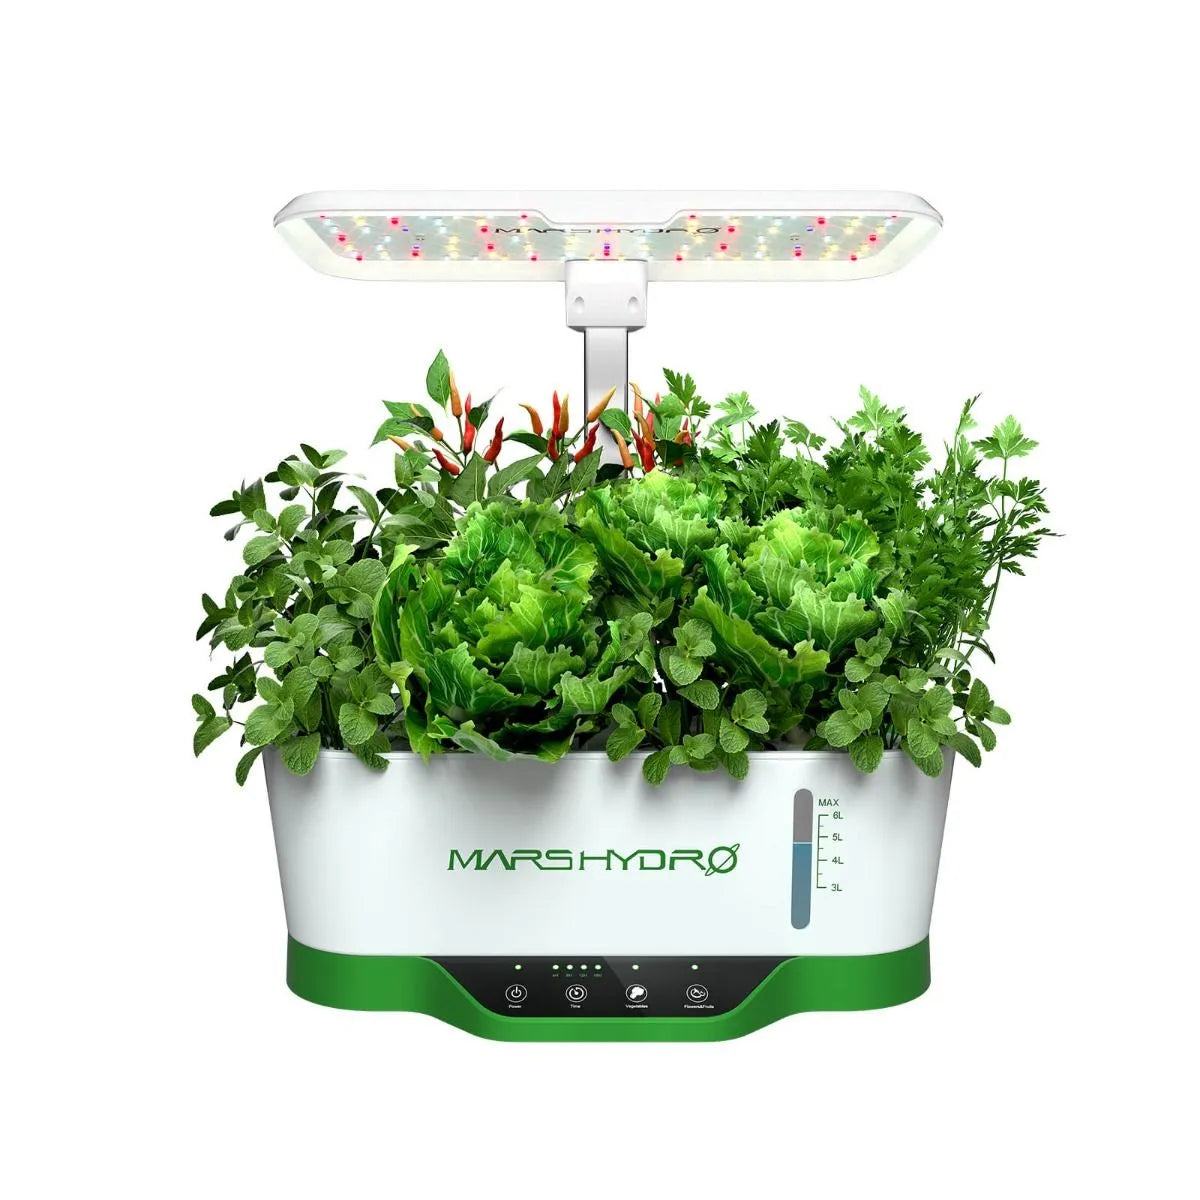
Mars Hydro HYDROLINE12 LED Hydropnic Growing System for seedling and clone
Mars Hydro Hydroponic 12 Pods...
Spider Farmer
Spider Farmer GGS Grow Tent Climate Controller Kits: Temperature, Humidity, VPD Monitoring, Scheduling, Data Tracking, Bluetooth & WiFi for Optimized Climate Management
Spider Farmer Smart Controller Only Outle...
Spider Farmer
Spider Farmer GGS AC5 Power Strip with 5 Outlets for Grow Tent Climate Control, Featuring Temperature, Humidity, VPD Monitoring, Scheduling, Historical Data Tracking, Bluetooth & WiFi Connectivity
Spider Farmer Smart 5 Outlets...
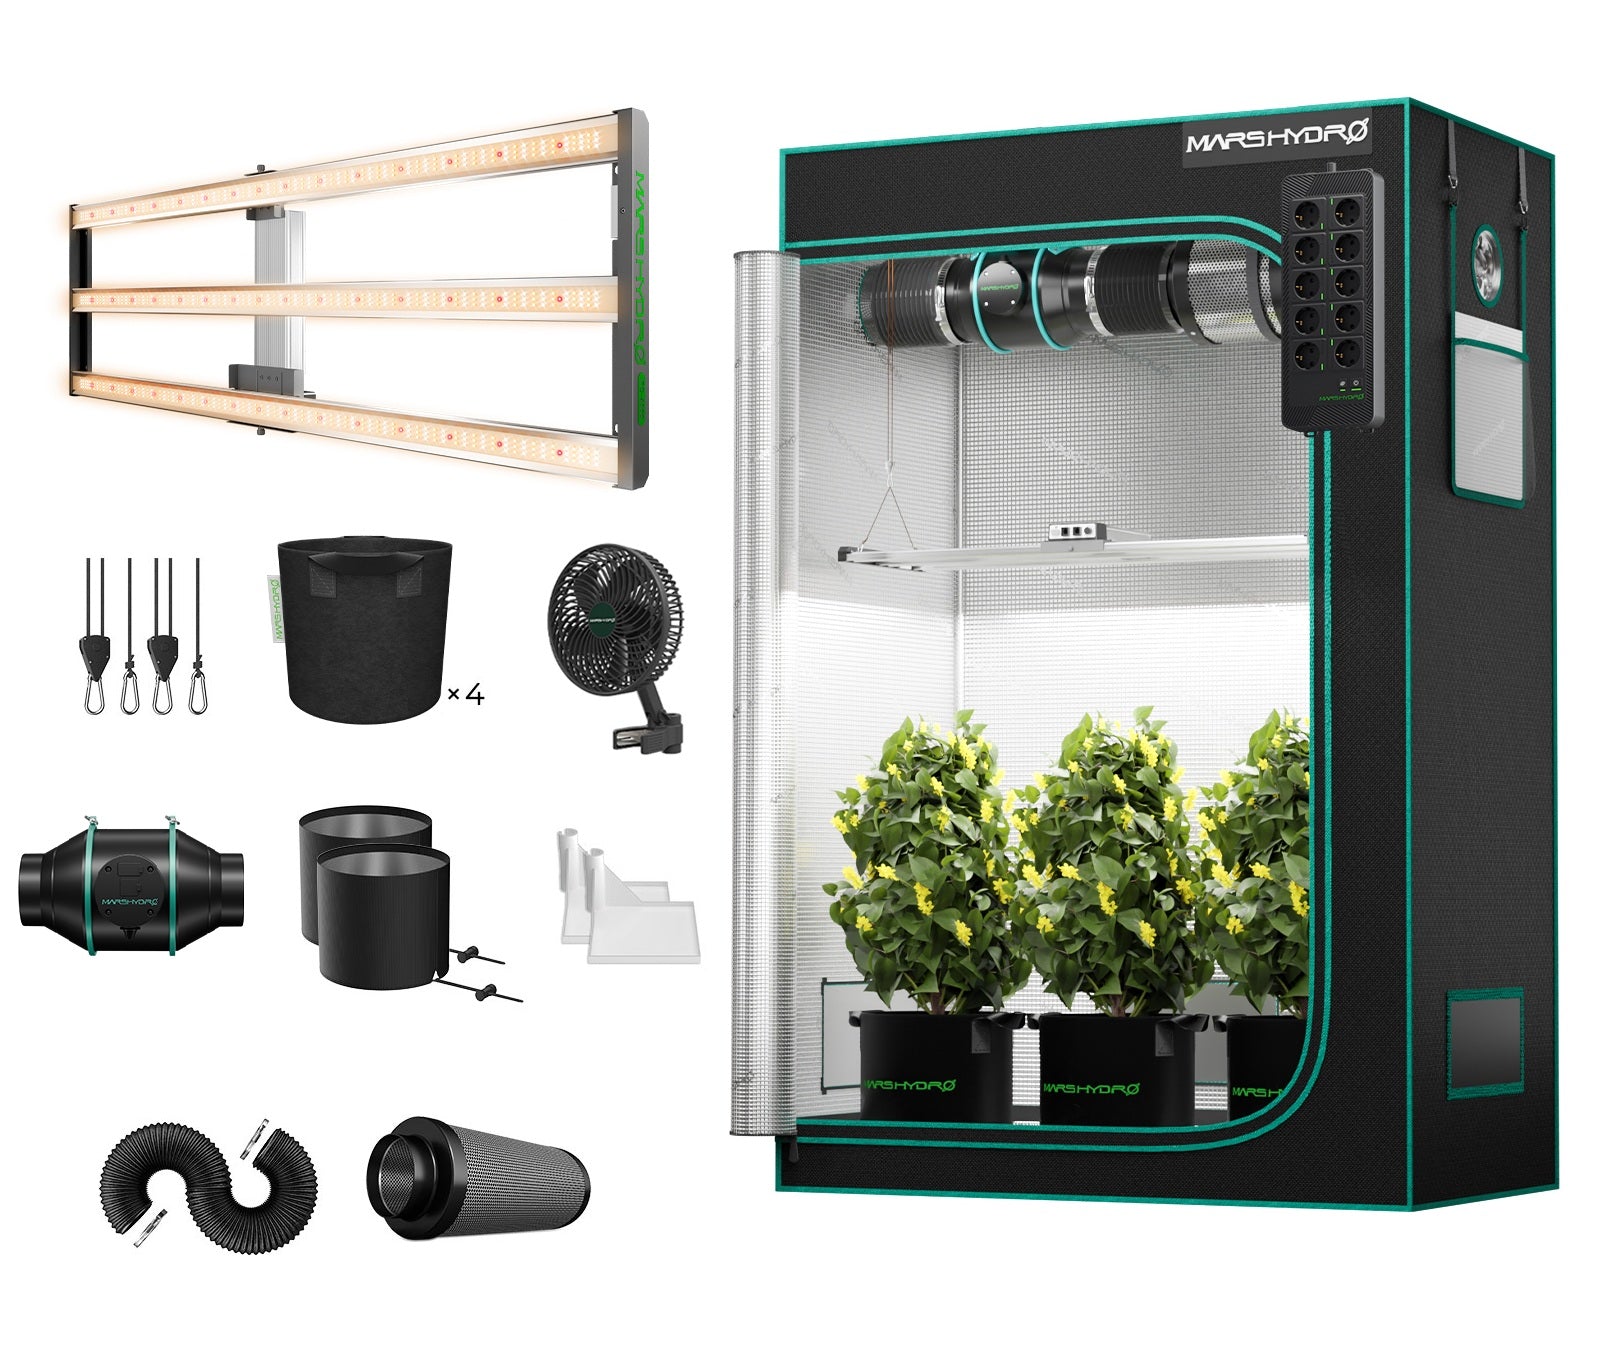
Mars Hydro
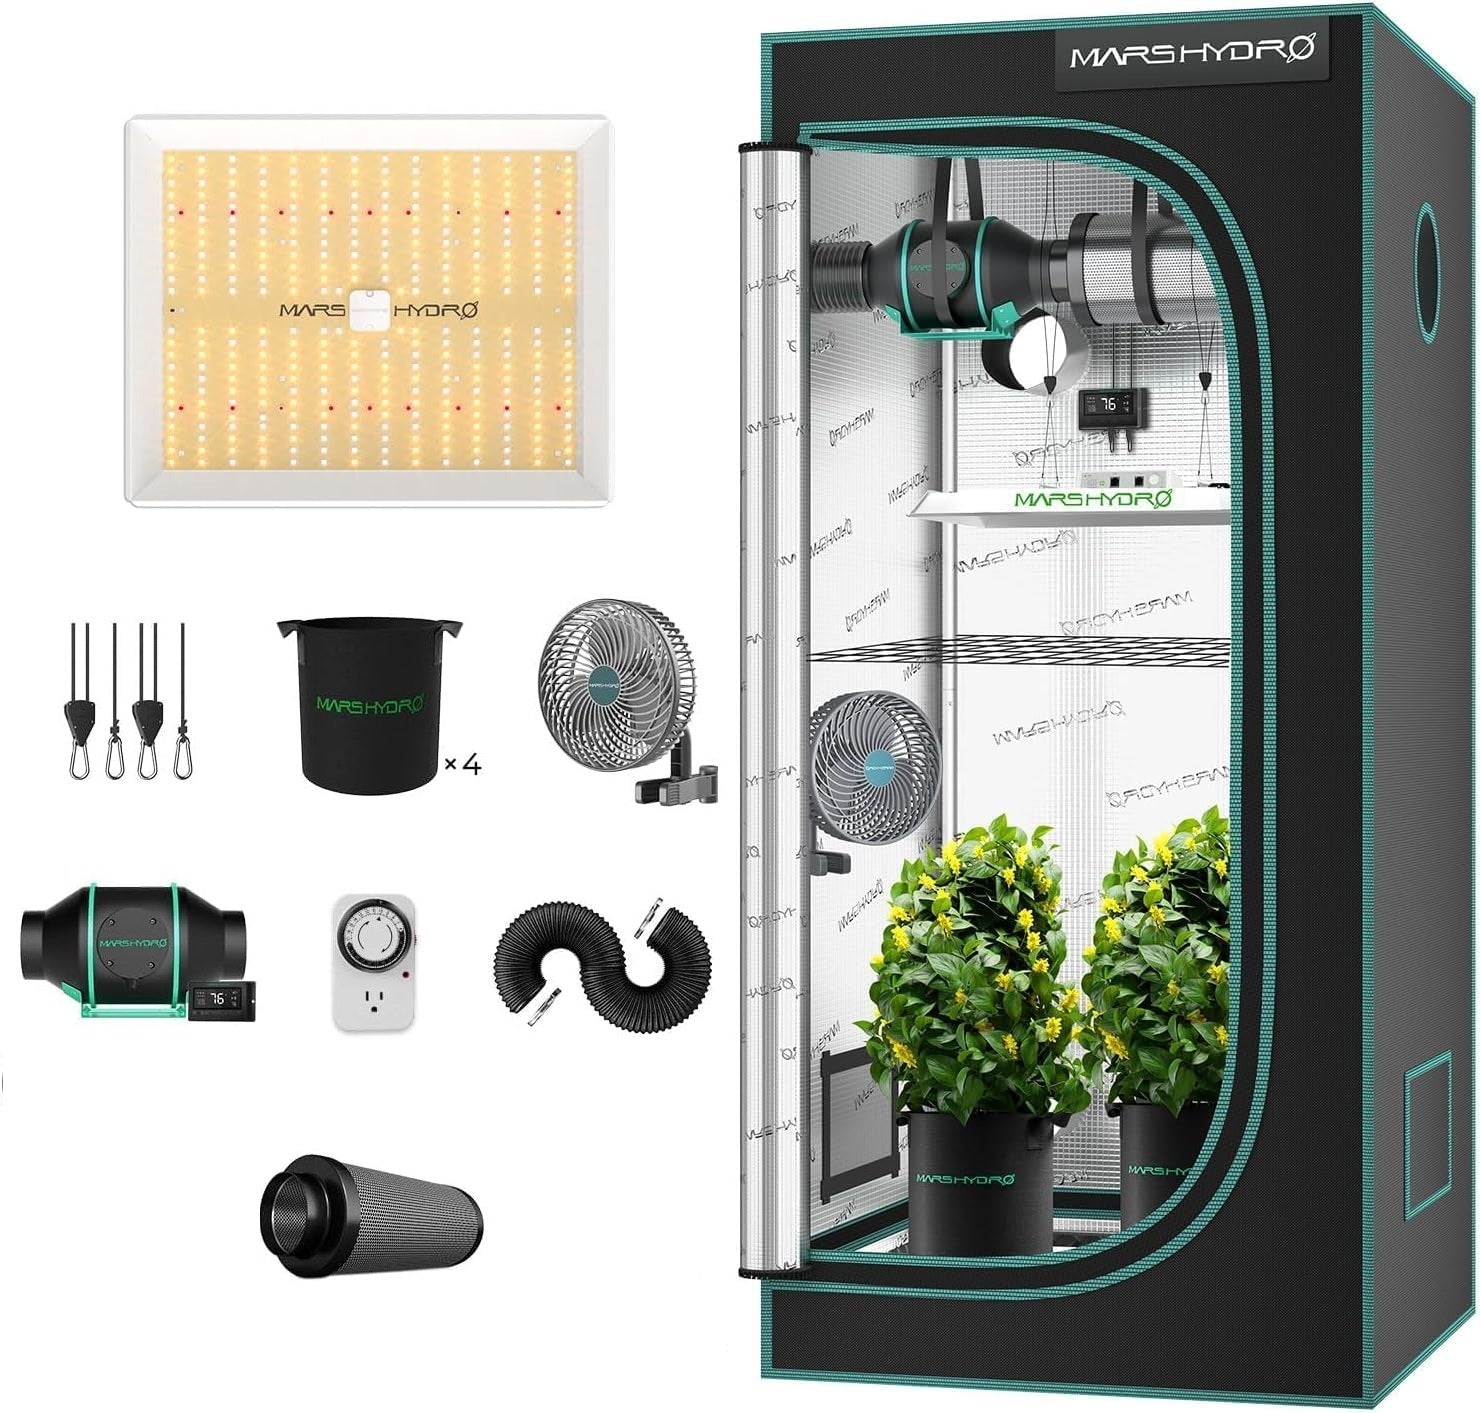
Marshydro TS 1000 Complete Kit | 1m x 1m Mini Greenhouse Kit
Complete Growi...
Mars Hydro
Marshydro TSW 2000 Complete Kit | 120cm x 120cm Mini Greenhouse Kit
Complete Growi...

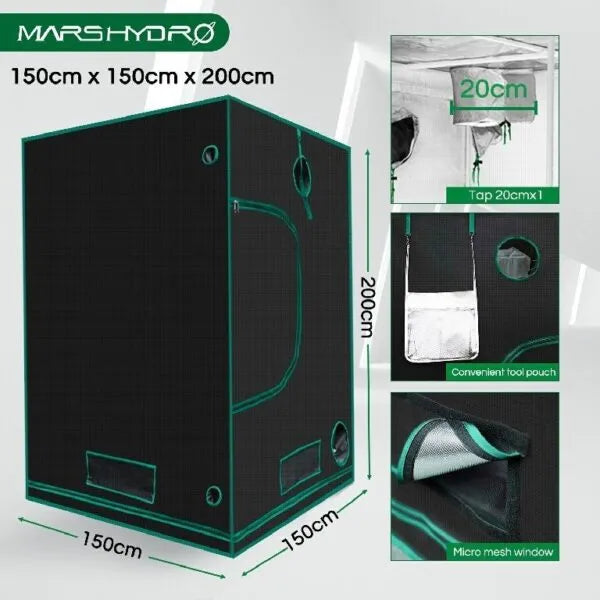
Mars Hydro
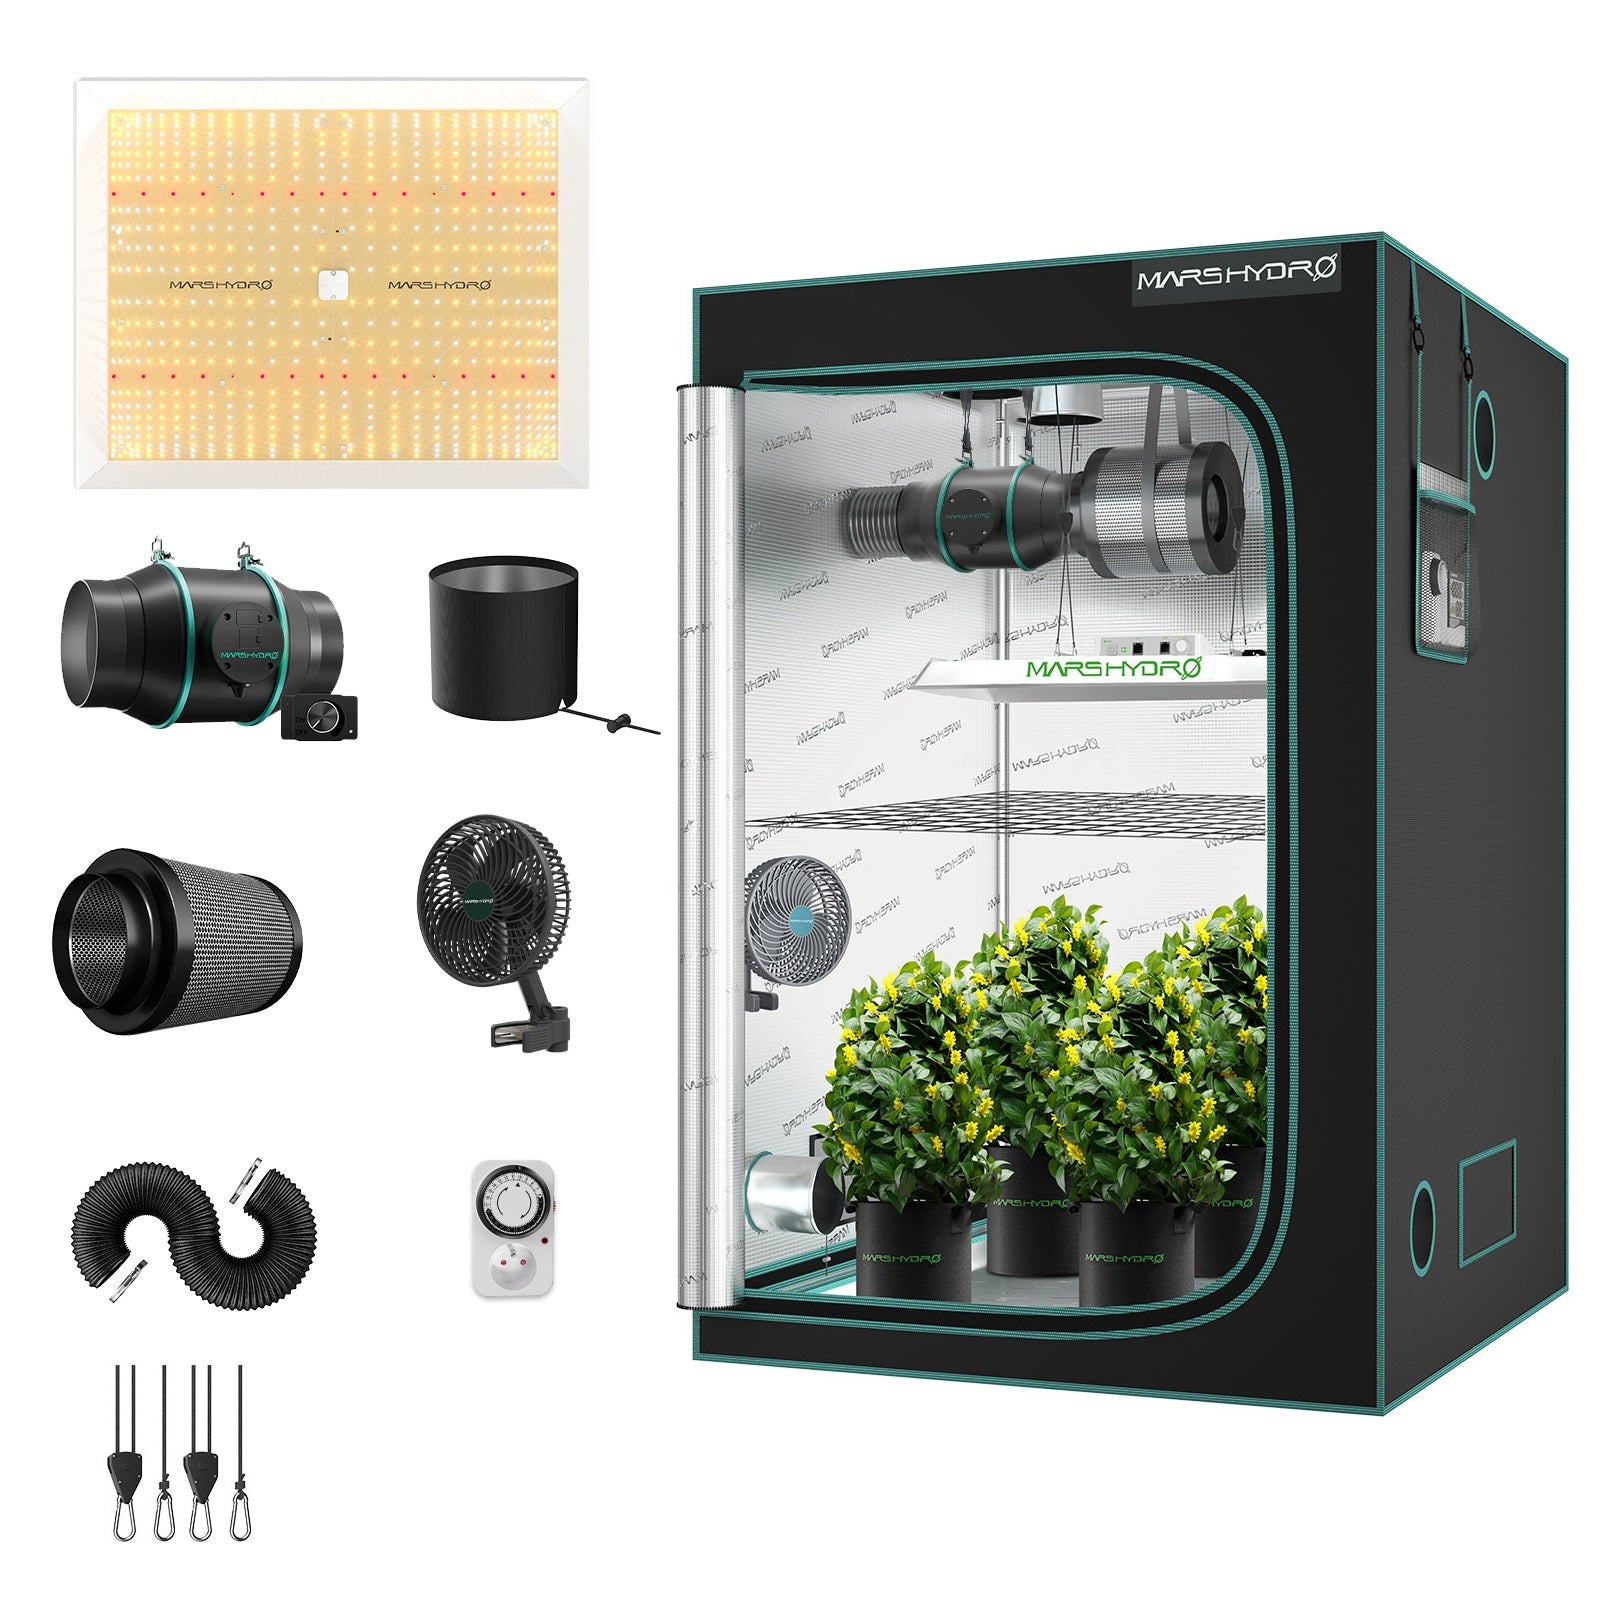
Marshydro TS 3000 Complete Kit | 150cm x 150cm Mini Greenhouse Kit
Complete Growi...

Mars Hydro
Marshydro FCE 3000 Complete Kit | 150cm x 150cm Mini Greenhouse Kit
Complete Growi...

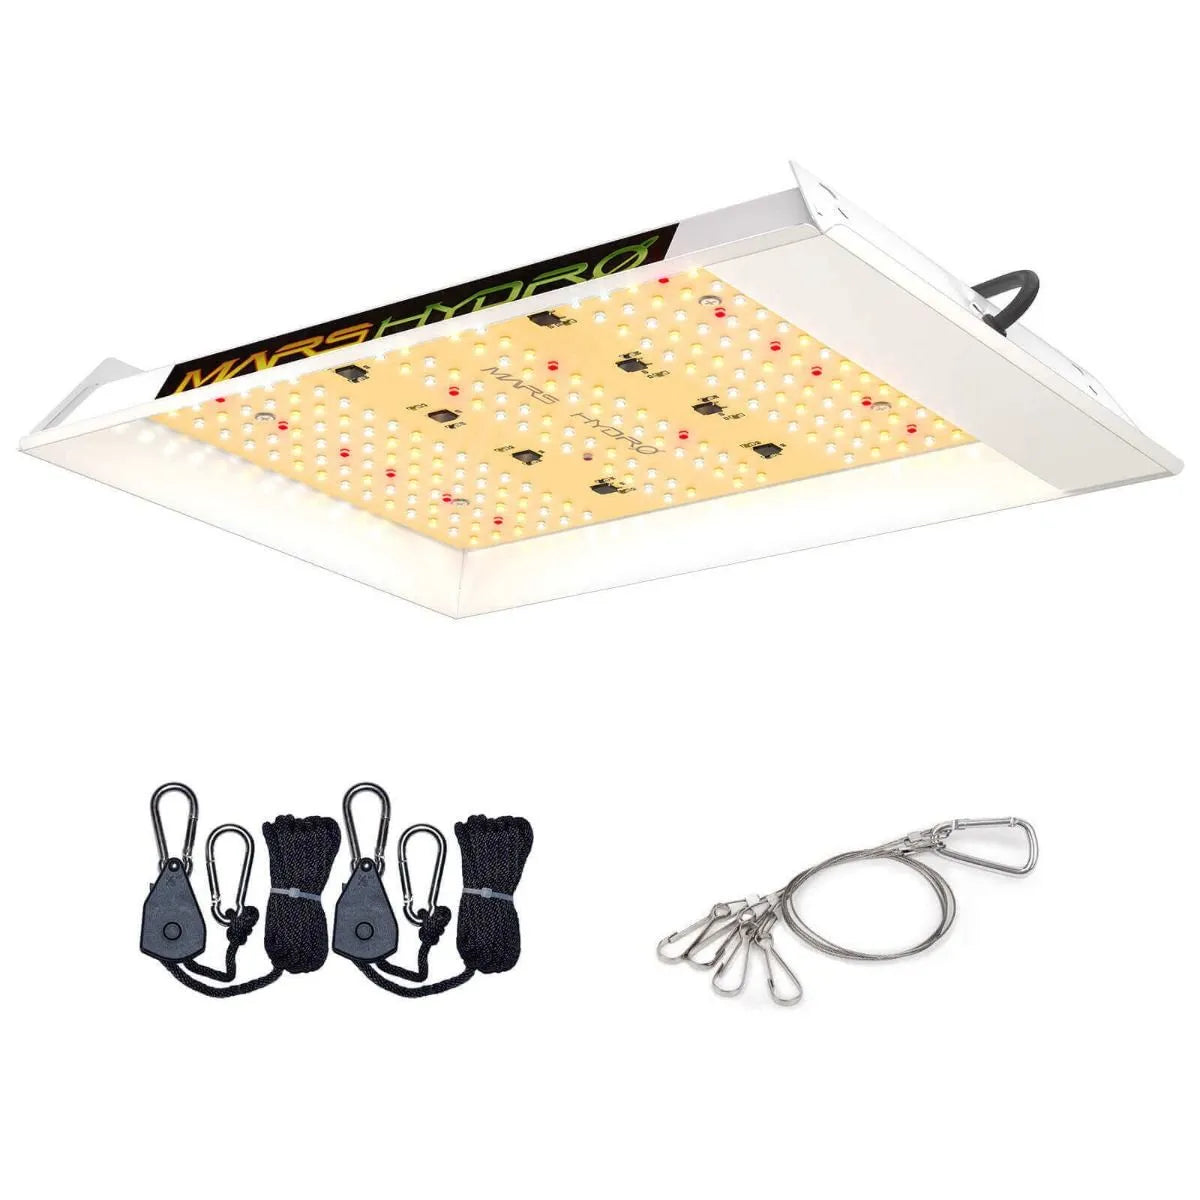
Mars Hydro
Mars Hydro TSW 2000 | 150cm x 150cm Mini Greenhouse Kit
Complete Growi...

Mars Hydro
Mars Hydro 8X8 Grow Tent – 96”X96”X80”(240X240X200CM)
Premium Grow T...

Mars Hydro
Mars Hydro 4X8 Grow Tent – 96”X48”X80”(240X120X200CM)
Premium Grow T...

Mars Hydro
Mars Hydro 2-in-1 150 x 120 x 200cm Grow Tent
Premium Grow T...
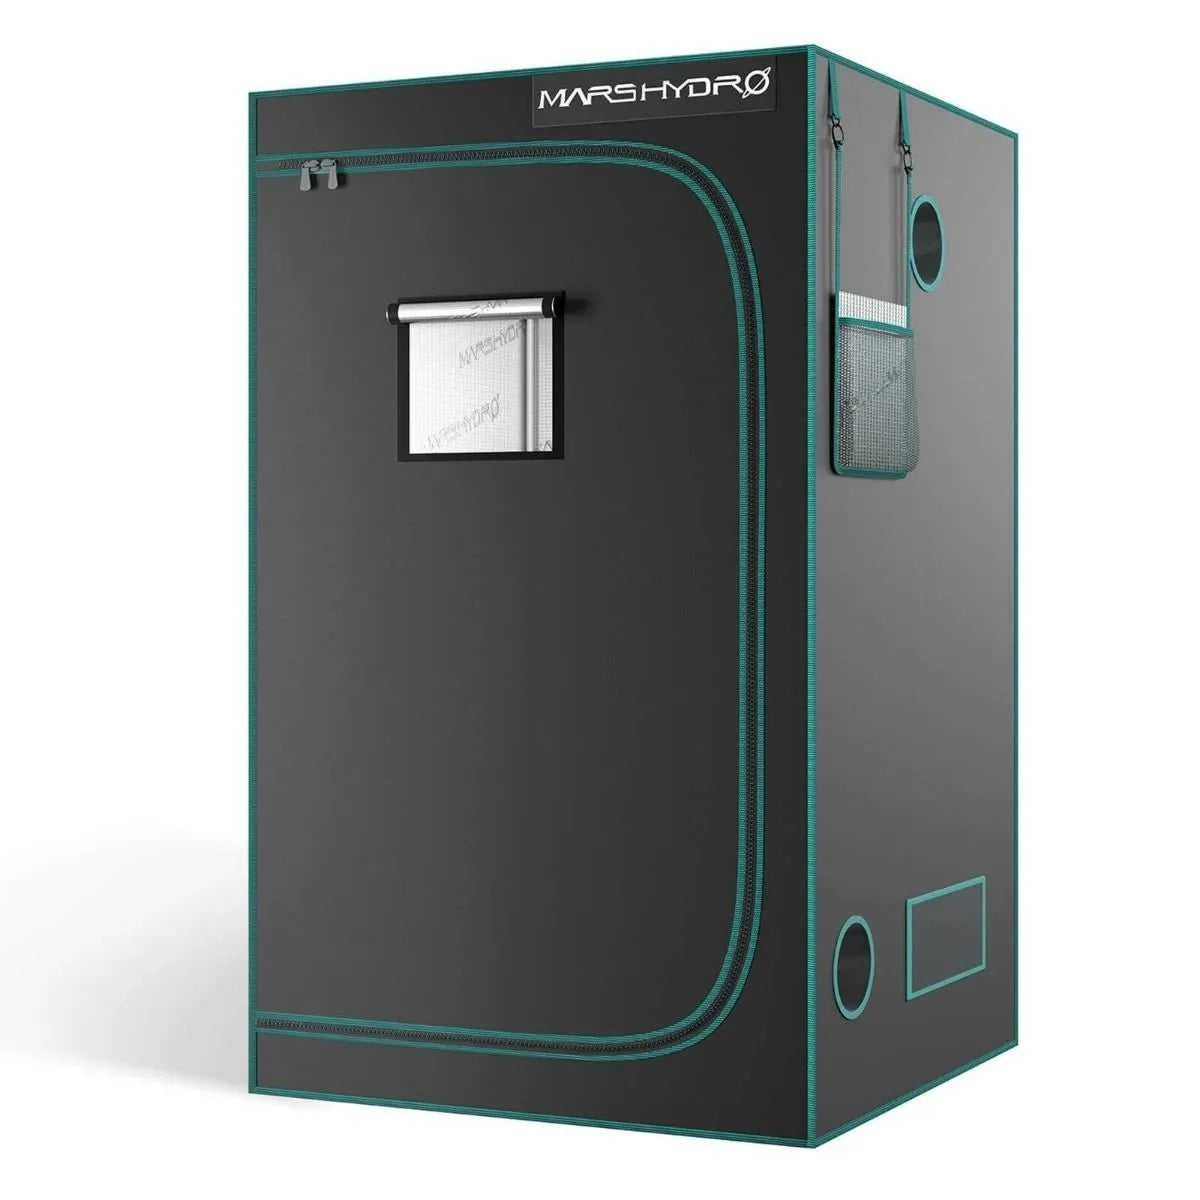
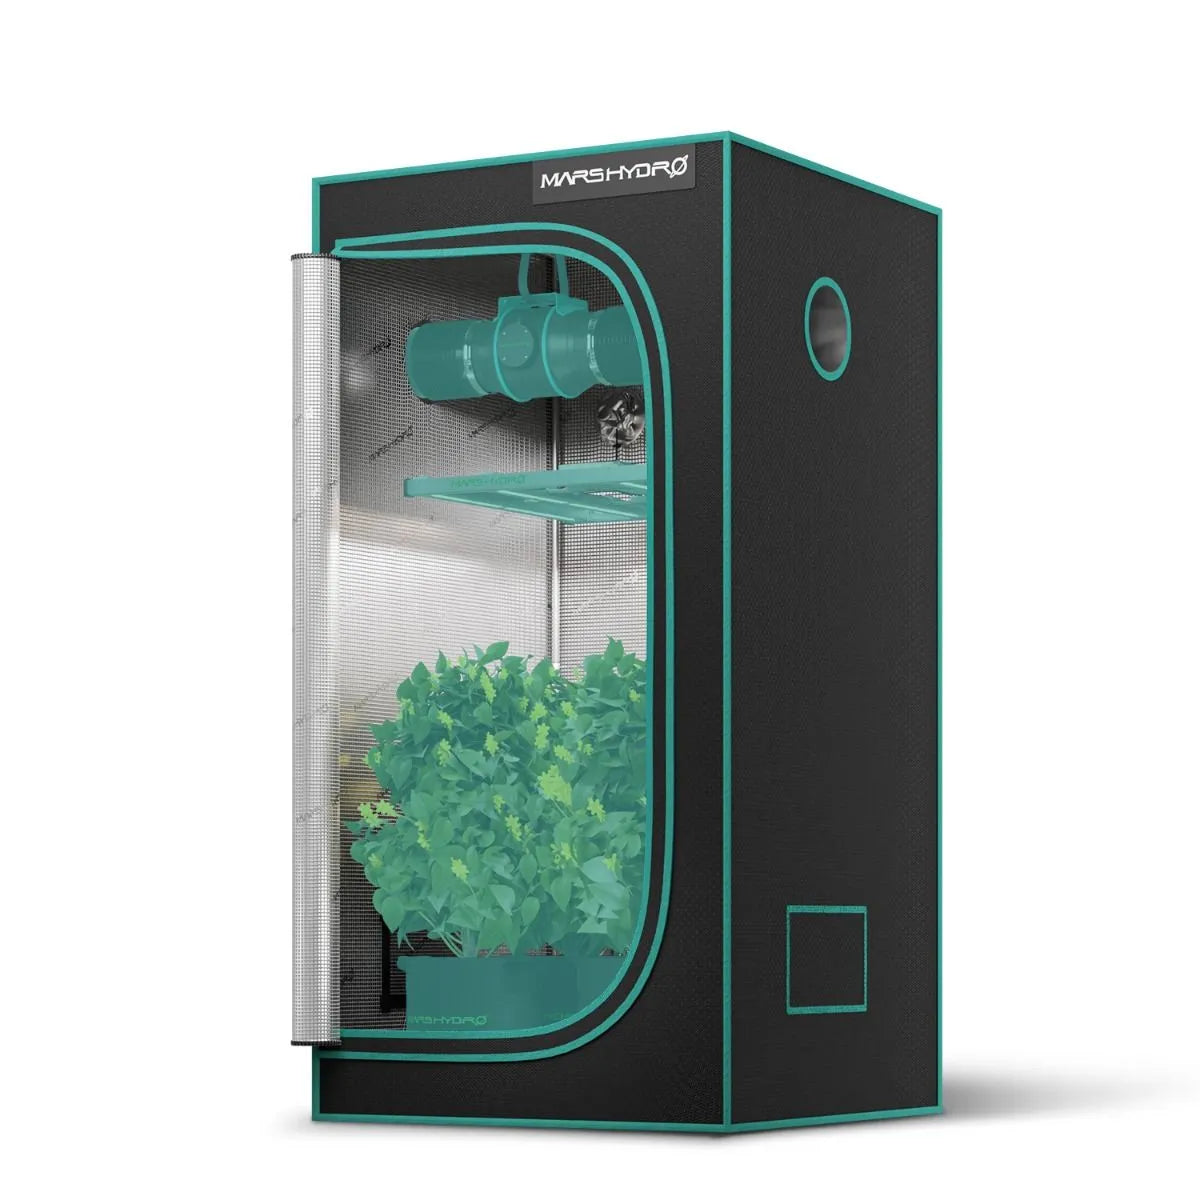
Mars Hydro
Mars Hydro 60”X60”X80” Hydroponic Indoor Grow Tent – 5’X5′(150X150X200CM)
Premium Grow T...
Mars Hydro
Mars Hydro 4X4 Grow Tent – 48″X48″X80″(120X120X200CM)
Premium Grow T...
Mars Hydro
Mars Hydro 3×3 Grow Tent – (100x100x160cm)
Premium Grow T...

Spider Farmer
Spider Farmer® SE1200W EVO
Commercial Grade SE Series Sa...
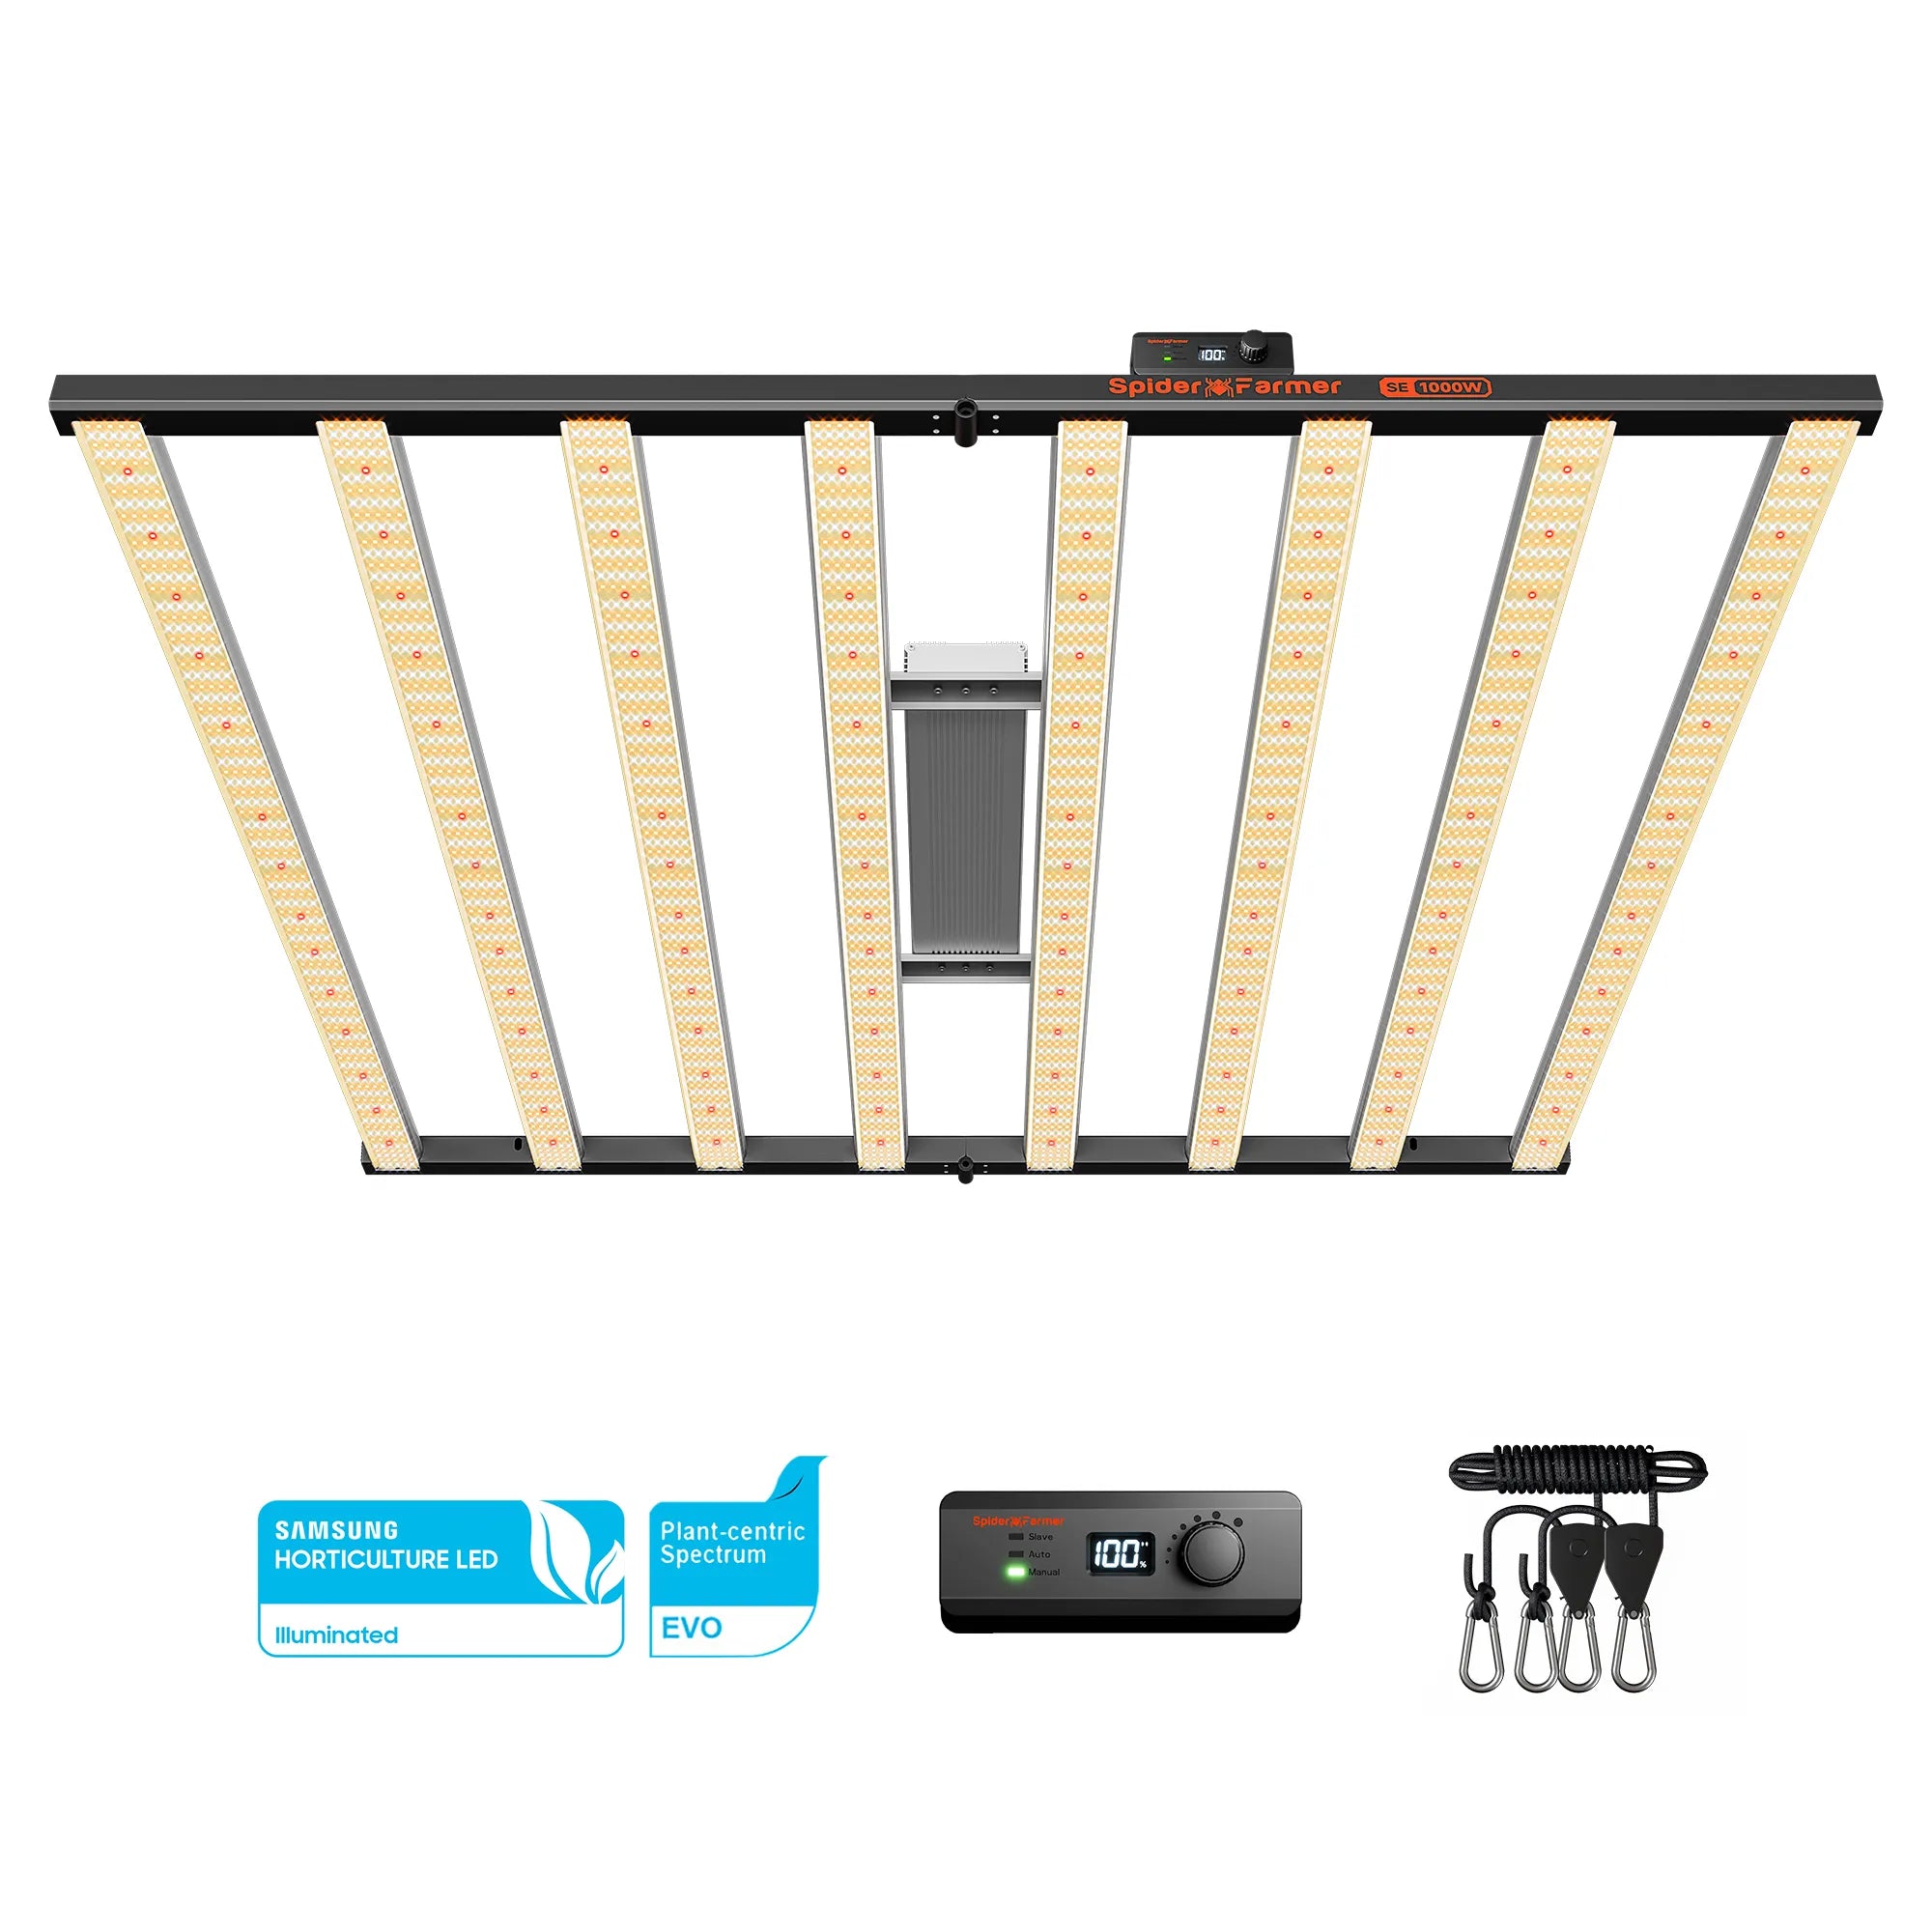
Spider Farmer
Spider Farmer® SE1000W
Commercial Grade SE Series Sa...
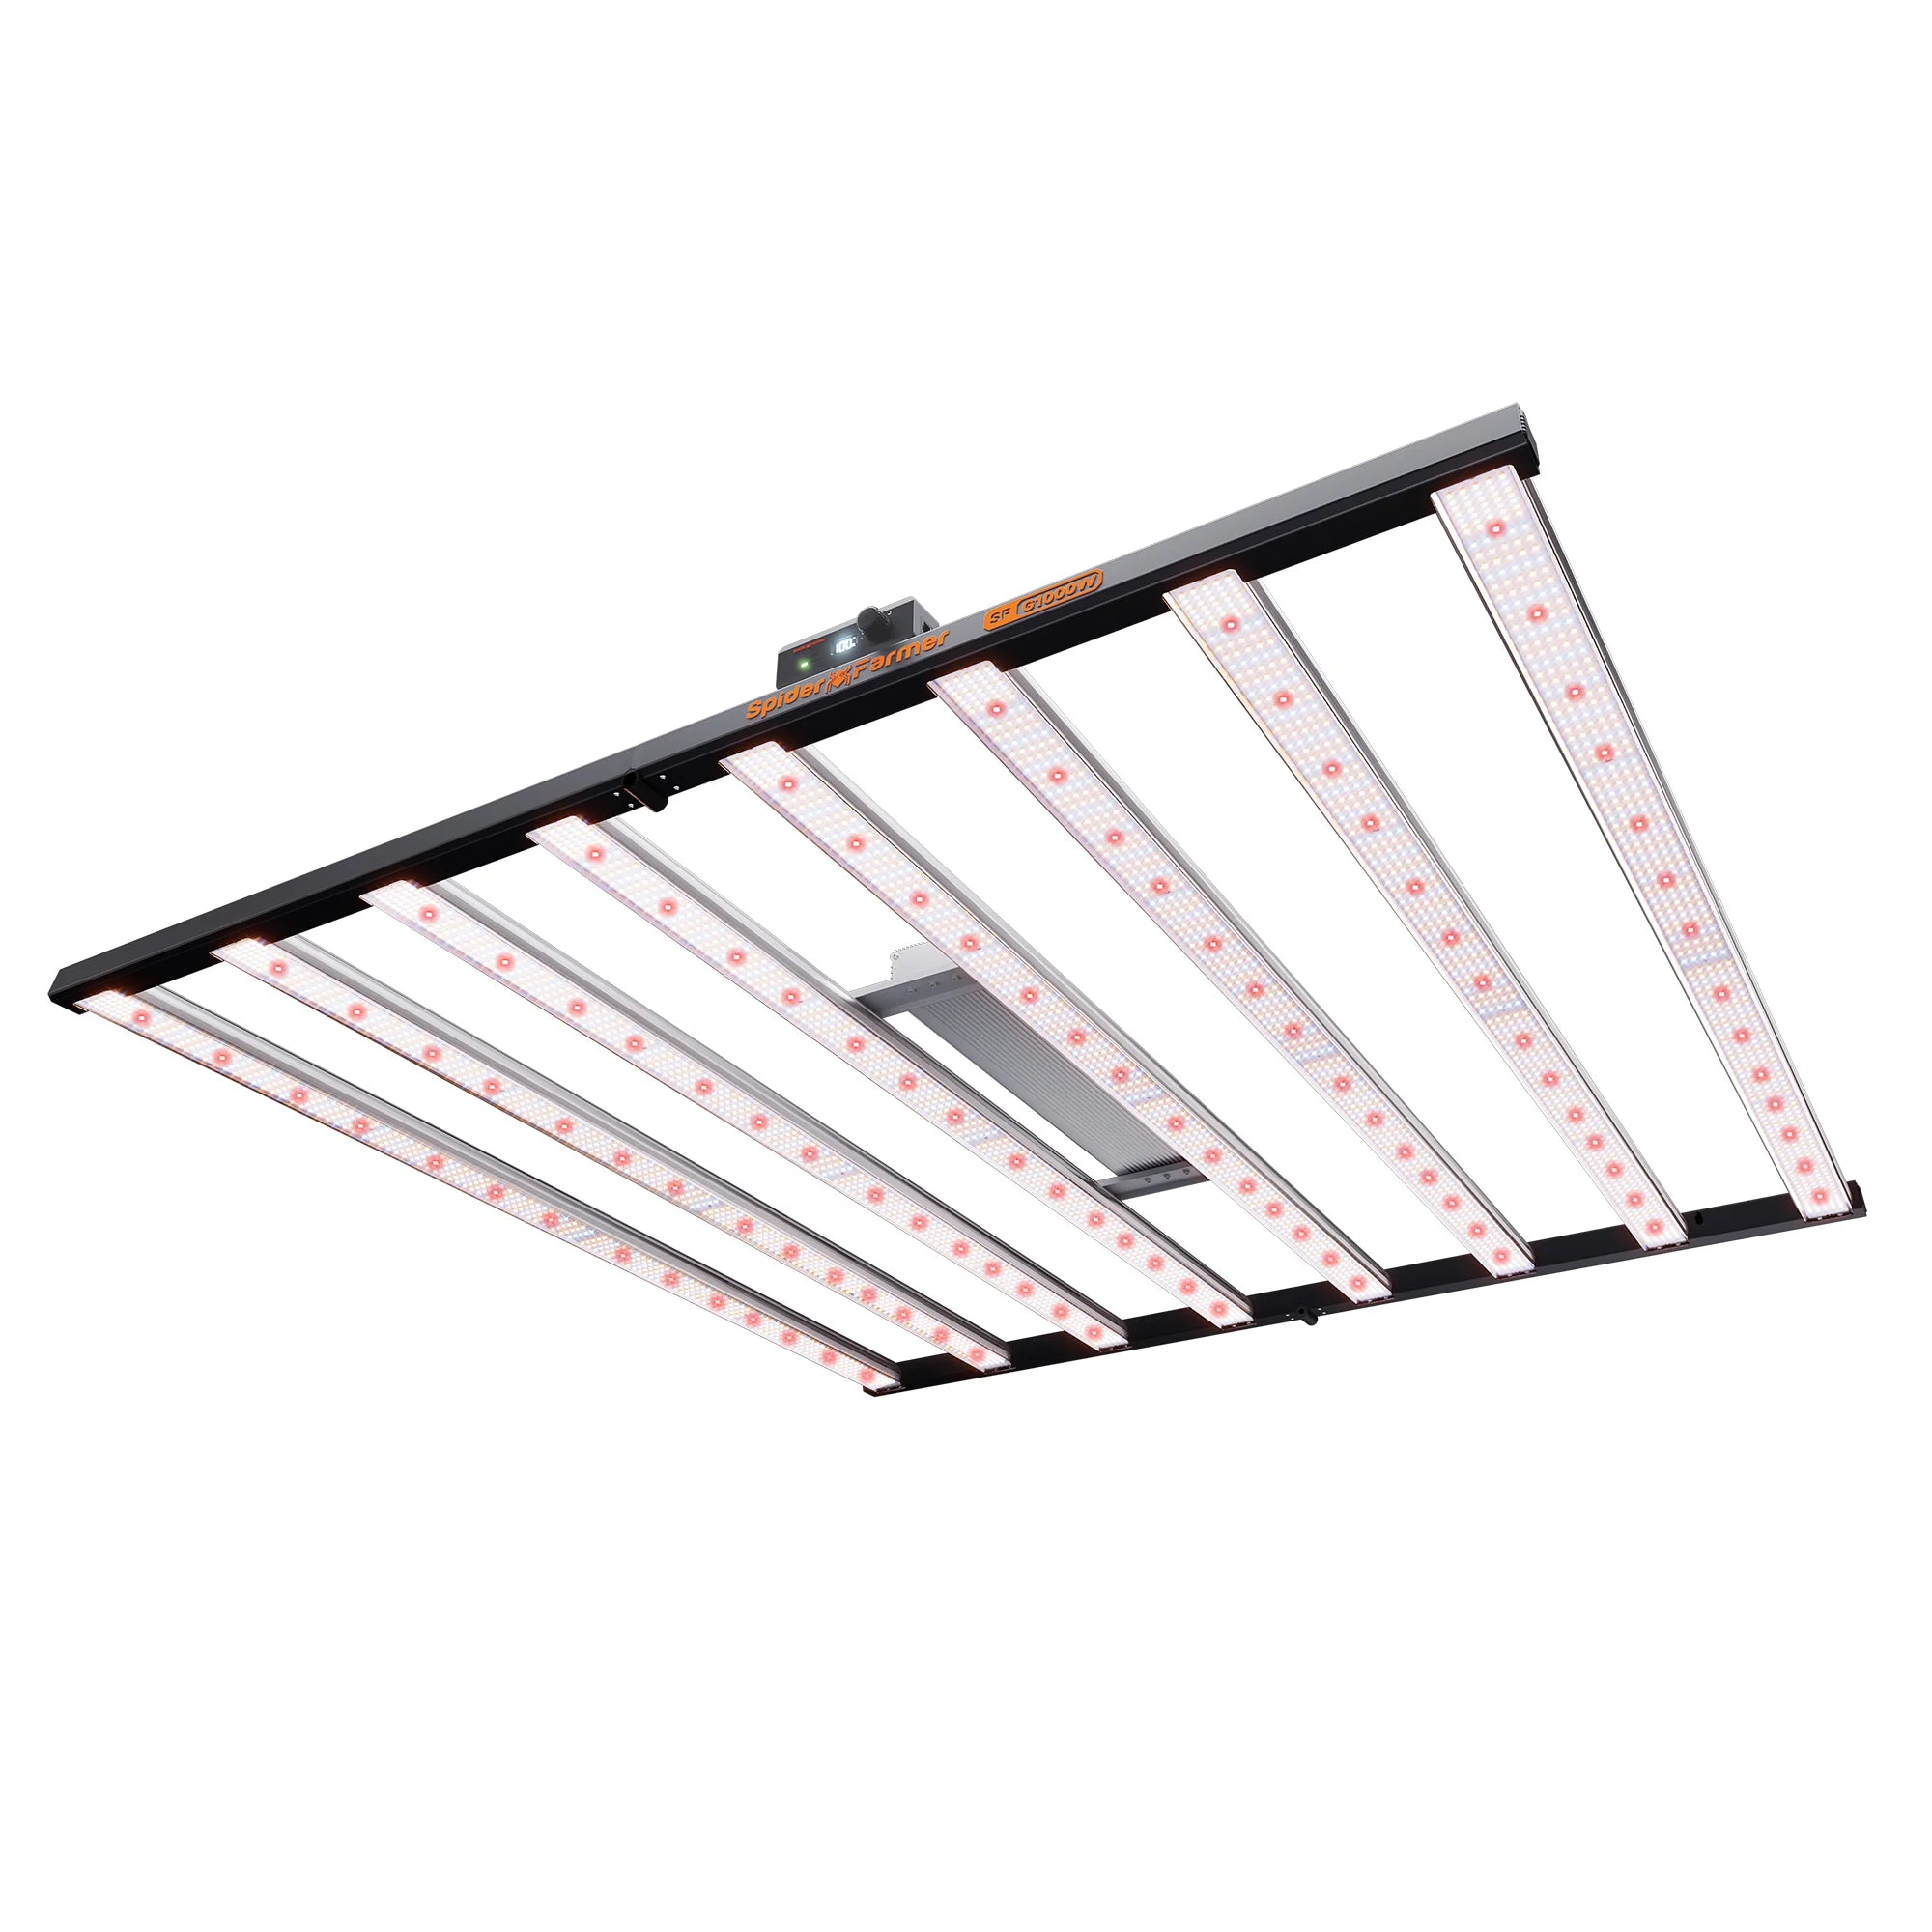
Spider Farmer
Spider Farmer® G1000W
Commercial Grade G Series Bri...
Mars Hydro
Marshydro FC 4000 EVO Complete Kit | 120cm x 60cm Mini Greenhouse Kit
Profe...

Spider Farmer
Spider Farmer® SE5000
Professional SE Series Samsun...
Not Sure What You Need?
Use our Smart Configurator to get personalized equipment recommendations based on your space and goals.
Launch Configurator